> ## Documentation Index
> Fetch the complete documentation index at: https://docs.getpara.com/llms.txt
> Use this file to discover all available pages before exploring further.
# OAuth Social Logins
> Add social login options to your Para integration
export const Card = ({imgUrl, iconUrl, fontAwesomeIcon, title, description, href, horizontal = false}) => {
return ;
};
export const Link = ({href, label}) => {
e.currentTarget.querySelector("#underline").style.height = "2px";
}} onMouseLeave={e => {
e.currentTarget.querySelector("#underline").style.height = "1px";
}}>
{label}
;
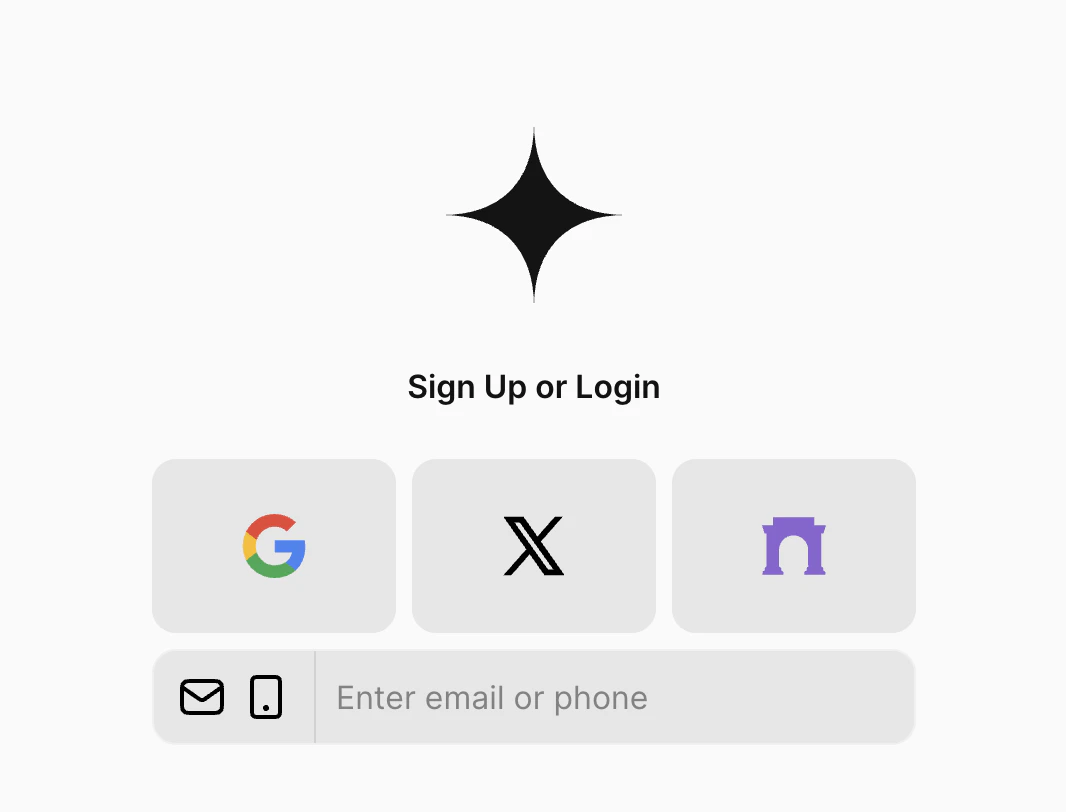 Para supports various OAuth methods to authenticate users across different platforms. Currently supported platforms
include Google, Facebook, Discord, Twitter, Telegram, Farcaster, and Apple.
Para automatically links wallets with a common email identifier to avoid creating duplicate wallets if users choose
different methods in different sessions. Because of this, **users must have an email associated with their login
account of choice**. Without an email linked to the account, authentication will fail and the user will see a prompt
to either add email to their social account or try a different method.
## Integrating Social Logins
You have two options when for using social logins with Para. You can use the Para Modal and simply pass in your desired
OAuth methods, or you can use the SDK to manually control the OAuth process and create your own custom UI.
### Para Modal
Social Logins can be easily integrated via the `ParaModal` component by passing the desired options as an array to the
`oAuthMethods` property:
```tsx theme={null}
import { ParaModal, OAuthMethod } from "@getpara/web-sdk";
const para = new Para(Environment.BETA, YOUR_API_KEY);
;
```
You can just use `[Object.values(OAuthMethod)]` to get all the available OAuth methods as an array.
### Custom OAuth Implementation
For developers implementing their own authentication UI, Para provides methods to handle OAuth authentication and
subsequent wallet creation.
```typescript theme={null}
import { OAuthMethod } from "@getpara/web-sdk";
const handleOAuthAuthentication = async (method: OAuthMethod) => {
const oAuthURL = await para.getOAuthURL(method);
window.open(oAuthURL, "oAuthPopup", "popup=true");
const { email, userExists } = await para.waitForOAuth();
const authUrl = userExists
? await para.initiateUserLogin({ email, useShortUrl: false })
: await para.getSetUpBiometricsURL({ authType: "email", isForNewDevice: false });
const popupWindow = window.open(authUrl, userExists ? "loginPopup" : "signUpPopup", "popup=true");
const result = await (userExists ? para.waitForLoginAndSetup({ popupWindow }) : para.waitForPasskeyAndCreateWallet());
if ("needsWallet" in result && result.needsWallet) {
await para.createWallet({ skipDistribute: false });
}
if ("recoverySecret" in result) {
const recoverySecret = result.recoverySecret;
// Store or handle recovery secret as needed
}
};
```
This implementation provides a complete OAuth flow, from initial authentication through wallet creation and recovery
secret generation. For best practice and ease of use, you can split the code into separate functions for each new user
creation flow, login flow, and wallet creation flow.
**Beta Testing Email** In the `BETA` Environment, you can use any email ending in `@test.getpara.com` (like
[dev@test.getpara.com](mailto:dev@test.getpara.com)). Any OTP code will work for verification with these test emails. These credentials are for beta
testing only. You can delete test users anytime in the beta developer console to free up user slots.
Farcaster authentication follows a similar pattern but uses Farcaster-specific methods. Here's how to implement a complete Farcaster authentication flow:
```typescript theme={null}
const handleFarcasterAuthentication = async () => {
const connectUri = await para.getFarcasterConnectURL();
window.open(connectUri, "farcasterConnectPopup", "popup=true");
const { userExists, username } = await para.waitForFarcasterStatus();
const authUrl = userExists
? await para.initiateUserLogin({ email: username, useShortUrl: false })
: await para.getSetUpBiometricsURL({ authType: "farcaster", isForNewDevice: false });
const popupWindow = window.open(authUrl, userExists ? "loginPopup" : "signUpPopup", "popup=true");
await (userExists ? para.waitForLoginAndSetup({ popupWindow }) : para.waitForPasskeyAndCreateWallet());
};
```
### Telegram OAuth Login
To implement your own Telegram authentication flow, please refer to the
[official documentation](https://core.telegram.org/widgets/login). Para uses the following bots to handle authentication
requests:
| Environment | Username | Bot ID |
| ----------- | ----------------------------------------------------------- | ---------- |
| `BETA` | [@para\_oauth\_beta\_bot](https://t.me/para_oauth_beta_bot) | 7788006052 |
| `PROD` | [@para\_oauth\_bot](https://t.me/para_oauth_bot) | 7643995807 |
When you receive an authentication payload, you can use `para.verifyTelegram()` to validate the payload hash and either
find or create the Para user for that Telegram user ID, all in one step. As with Farcaster, these users will not have an
associated email or phone number and will thereafter need to use Telegram to sign in to your app.
```javascript theme={null}
// Example payload:
// {
// id: 123456789,
// first_name: 'John',
// last_name: 'Doe',
// username: 'johndoe',
// photo_url: 'https://example.com/photo.jpg',
// auth_date: Date.now(),
// hash: '...',
// }
// Wait for the user to be authenticated via the OAuth method through Para.
const result = await para.verifyTelegram(payload);
if (!result.isValid) {
// Handle auth failure
} else {
const { telegramUserId, userId: paraUserId, isNewUser, supportedAuthMethods, biometricHints } = result;
if (isNewUser || supportedAuthMethods.length === 0) {
// Create sign-in methods for user if they don't have any
const createPasskeyUrl = await para.getSetUpBiometricsURL({ authType: "telegram", isForNewDevice: false });
} else if (supportedAuthMethods.includes(AuthMethod.PASSKEY)) {
// Log in previously created user
const loginUrl = await para.initiateUserLogin({ useShortUrl: false, email: telegramUserId });
}
}
```
With these implementations, you can seamlessly integrate OAuth social logins into your application with your own custom
UI.
## Account Metadata
To fetch account metadata for a particular user from their most recent OAuth login on your app - for example, their
Google profile image or their Discord clan information - use the `getAccountMetadata` method. This returns an object,
indexed by the third-party service name, containing the date of the login and the metadata returned from the service at
that time.
```ts theme={null}
type AccountMetadataKey = "google" | "x" | "discord" | "apple" | "facebook" | "telegram" | "farcaster";
type AccountMetadata = Partial<
Record<
AccountMetadataKey,
{
date: string;
metadata: any;
}
>
>;
const para = new Para(Environment.BETA, YOUR_API_KEY);
async function fetchAccountMetadata(): Promise {
const accountMetadata: AccountMetadata = await para.getAccountMetadata();
return accountMetadata;
}
```
Metadata will only be returned for services that the user authenticated with your app specifically. The particular
structure of the metadata will depend on the service in question. A sample response might resemble:
```json theme={null}
{
"discord": {
"date": "2022-01-01T00:00:00Z",
"metadata": {
"id": "80351110224678912",
"username": "User",
"discriminator": "1337",
"avatar": "8342729096ea3675442027381ff50dfe",
"verified": true,
"email": "user@email.com",
"flags": 64,
"banner": "06c16474723fe537c283b8efa61a30c8",
"accent_color": 16711680,
"premium_type": 1,
"public_flags": 64,
"avatar_decoration_data": {
"sku_id": "1144058844004233369",
"asset": "a_fed43ab12698df65902ba06727e20c0e"
}
}
},
"google": {
"date": "2024-11-01T00:00:00Z",
"metadata": {
"id": "000000000000000000000",
"emails": [
{
"value": "test@email.com",
"verified": true
}
],
"photos": [
{
"value": "https://.../photo.jpg"
}
],
"provider": "google"
}
},
"x": {
"date": "2025-01-06T12:34:56Z",
"metadata": {
"id": 171290000000000500,
"url": null,
"lang": null,
"name": "Test User",
"email": "user@email.com",
"id_str": "171290000000000500",
"entities": {
"description": {
"urls": []
}
},
"location": "",
"verified": false,
"following": false,
"protected": false,
"suspended": false,
"time_zone": null,
"created_at": "Fri Oct 13 19:11:38 +0000 2023",
"utc_offset": null,
"description": "",
"geo_enabled": false,
"screen_name": "TheirXUsername",
"listed_count": 0,
"friends_count": 0,
"is_translator": false,
"notifications": false,
"statuses_count": 0,
"default_profile": true,
"followers_count": 0,
"translator_type": "none",
"favourites_count": 0,
"profile_image_url": "http://pbs.twimg.com/profile_images/171290000000000500/hbDmgt_J_normal.png",
"profile_link_color": "1DA1F2",
"profile_text_color": "333333",
"follow_request_sent": false,
"contributors_enabled": false,
"has_extended_profile": true,
"default_profile_image": false,
"withheld_in_countries": [],
"is_translation_enabled": false,
"profile_background_tile": false,
"profile_image_url_https": "https://pbs.twimg.com/profile_images/171290000000000500/hbDmgt_J_normal.png",
"needs_phone_verification": false,
"profile_background_color": "F5F8FA",
"profile_sidebar_fill_color": "DDEEF6",
"profile_background_image_url": null,
"profile_sidebar_border_color": "C0DEED",
"profile_use_background_image": true,
"profile_background_image_url_https": null
}
}
}
```
## Examples
For an example code implementation of the above custom OAuth methods check out this simple **React + Next.js**
application:
You'll also find custom Phone and Email authentication examples in the same repository.
## Next Steps
After integrating Para, you can explore other features and integrations to enhance your Para experience.
Para supports various OAuth methods to authenticate users across different platforms. Currently supported platforms
include Google, Facebook, Discord, Twitter, Telegram, Farcaster, and Apple.
Para automatically links wallets with a common email identifier to avoid creating duplicate wallets if users choose
different methods in different sessions. Because of this, **users must have an email associated with their login
account of choice**. Without an email linked to the account, authentication will fail and the user will see a prompt
to either add email to their social account or try a different method.
## Integrating Social Logins
You have two options when for using social logins with Para. You can use the Para Modal and simply pass in your desired
OAuth methods, or you can use the SDK to manually control the OAuth process and create your own custom UI.
### Para Modal
Social Logins can be easily integrated via the `ParaModal` component by passing the desired options as an array to the
`oAuthMethods` property:
```tsx theme={null}
import { ParaModal, OAuthMethod } from "@getpara/web-sdk";
const para = new Para(Environment.BETA, YOUR_API_KEY);
;
```
You can just use `[Object.values(OAuthMethod)]` to get all the available OAuth methods as an array.
### Custom OAuth Implementation
For developers implementing their own authentication UI, Para provides methods to handle OAuth authentication and
subsequent wallet creation.
```typescript theme={null}
import { OAuthMethod } from "@getpara/web-sdk";
const handleOAuthAuthentication = async (method: OAuthMethod) => {
const oAuthURL = await para.getOAuthURL(method);
window.open(oAuthURL, "oAuthPopup", "popup=true");
const { email, userExists } = await para.waitForOAuth();
const authUrl = userExists
? await para.initiateUserLogin({ email, useShortUrl: false })
: await para.getSetUpBiometricsURL({ authType: "email", isForNewDevice: false });
const popupWindow = window.open(authUrl, userExists ? "loginPopup" : "signUpPopup", "popup=true");
const result = await (userExists ? para.waitForLoginAndSetup({ popupWindow }) : para.waitForPasskeyAndCreateWallet());
if ("needsWallet" in result && result.needsWallet) {
await para.createWallet({ skipDistribute: false });
}
if ("recoverySecret" in result) {
const recoverySecret = result.recoverySecret;
// Store or handle recovery secret as needed
}
};
```
This implementation provides a complete OAuth flow, from initial authentication through wallet creation and recovery
secret generation. For best practice and ease of use, you can split the code into separate functions for each new user
creation flow, login flow, and wallet creation flow.
**Beta Testing Email** In the `BETA` Environment, you can use any email ending in `@test.getpara.com` (like
[dev@test.getpara.com](mailto:dev@test.getpara.com)). Any OTP code will work for verification with these test emails. These credentials are for beta
testing only. You can delete test users anytime in the beta developer console to free up user slots.
Farcaster authentication follows a similar pattern but uses Farcaster-specific methods. Here's how to implement a complete Farcaster authentication flow:
```typescript theme={null}
const handleFarcasterAuthentication = async () => {
const connectUri = await para.getFarcasterConnectURL();
window.open(connectUri, "farcasterConnectPopup", "popup=true");
const { userExists, username } = await para.waitForFarcasterStatus();
const authUrl = userExists
? await para.initiateUserLogin({ email: username, useShortUrl: false })
: await para.getSetUpBiometricsURL({ authType: "farcaster", isForNewDevice: false });
const popupWindow = window.open(authUrl, userExists ? "loginPopup" : "signUpPopup", "popup=true");
await (userExists ? para.waitForLoginAndSetup({ popupWindow }) : para.waitForPasskeyAndCreateWallet());
};
```
### Telegram OAuth Login
To implement your own Telegram authentication flow, please refer to the
[official documentation](https://core.telegram.org/widgets/login). Para uses the following bots to handle authentication
requests:
| Environment | Username | Bot ID |
| ----------- | ----------------------------------------------------------- | ---------- |
| `BETA` | [@para\_oauth\_beta\_bot](https://t.me/para_oauth_beta_bot) | 7788006052 |
| `PROD` | [@para\_oauth\_bot](https://t.me/para_oauth_bot) | 7643995807 |
When you receive an authentication payload, you can use `para.verifyTelegram()` to validate the payload hash and either
find or create the Para user for that Telegram user ID, all in one step. As with Farcaster, these users will not have an
associated email or phone number and will thereafter need to use Telegram to sign in to your app.
```javascript theme={null}
// Example payload:
// {
// id: 123456789,
// first_name: 'John',
// last_name: 'Doe',
// username: 'johndoe',
// photo_url: 'https://example.com/photo.jpg',
// auth_date: Date.now(),
// hash: '...',
// }
// Wait for the user to be authenticated via the OAuth method through Para.
const result = await para.verifyTelegram(payload);
if (!result.isValid) {
// Handle auth failure
} else {
const { telegramUserId, userId: paraUserId, isNewUser, supportedAuthMethods, biometricHints } = result;
if (isNewUser || supportedAuthMethods.length === 0) {
// Create sign-in methods for user if they don't have any
const createPasskeyUrl = await para.getSetUpBiometricsURL({ authType: "telegram", isForNewDevice: false });
} else if (supportedAuthMethods.includes(AuthMethod.PASSKEY)) {
// Log in previously created user
const loginUrl = await para.initiateUserLogin({ useShortUrl: false, email: telegramUserId });
}
}
```
With these implementations, you can seamlessly integrate OAuth social logins into your application with your own custom
UI.
## Account Metadata
To fetch account metadata for a particular user from their most recent OAuth login on your app - for example, their
Google profile image or their Discord clan information - use the `getAccountMetadata` method. This returns an object,
indexed by the third-party service name, containing the date of the login and the metadata returned from the service at
that time.
```ts theme={null}
type AccountMetadataKey = "google" | "x" | "discord" | "apple" | "facebook" | "telegram" | "farcaster";
type AccountMetadata = Partial<
Record<
AccountMetadataKey,
{
date: string;
metadata: any;
}
>
>;
const para = new Para(Environment.BETA, YOUR_API_KEY);
async function fetchAccountMetadata(): Promise {
const accountMetadata: AccountMetadata = await para.getAccountMetadata();
return accountMetadata;
}
```
Metadata will only be returned for services that the user authenticated with your app specifically. The particular
structure of the metadata will depend on the service in question. A sample response might resemble:
```json theme={null}
{
"discord": {
"date": "2022-01-01T00:00:00Z",
"metadata": {
"id": "80351110224678912",
"username": "User",
"discriminator": "1337",
"avatar": "8342729096ea3675442027381ff50dfe",
"verified": true,
"email": "user@email.com",
"flags": 64,
"banner": "06c16474723fe537c283b8efa61a30c8",
"accent_color": 16711680,
"premium_type": 1,
"public_flags": 64,
"avatar_decoration_data": {
"sku_id": "1144058844004233369",
"asset": "a_fed43ab12698df65902ba06727e20c0e"
}
}
},
"google": {
"date": "2024-11-01T00:00:00Z",
"metadata": {
"id": "000000000000000000000",
"emails": [
{
"value": "test@email.com",
"verified": true
}
],
"photos": [
{
"value": "https://.../photo.jpg"
}
],
"provider": "google"
}
},
"x": {
"date": "2025-01-06T12:34:56Z",
"metadata": {
"id": 171290000000000500,
"url": null,
"lang": null,
"name": "Test User",
"email": "user@email.com",
"id_str": "171290000000000500",
"entities": {
"description": {
"urls": []
}
},
"location": "",
"verified": false,
"following": false,
"protected": false,
"suspended": false,
"time_zone": null,
"created_at": "Fri Oct 13 19:11:38 +0000 2023",
"utc_offset": null,
"description": "",
"geo_enabled": false,
"screen_name": "TheirXUsername",
"listed_count": 0,
"friends_count": 0,
"is_translator": false,
"notifications": false,
"statuses_count": 0,
"default_profile": true,
"followers_count": 0,
"translator_type": "none",
"favourites_count": 0,
"profile_image_url": "http://pbs.twimg.com/profile_images/171290000000000500/hbDmgt_J_normal.png",
"profile_link_color": "1DA1F2",
"profile_text_color": "333333",
"follow_request_sent": false,
"contributors_enabled": false,
"has_extended_profile": true,
"default_profile_image": false,
"withheld_in_countries": [],
"is_translation_enabled": false,
"profile_background_tile": false,
"profile_image_url_https": "https://pbs.twimg.com/profile_images/171290000000000500/hbDmgt_J_normal.png",
"needs_phone_verification": false,
"profile_background_color": "F5F8FA",
"profile_sidebar_fill_color": "DDEEF6",
"profile_background_image_url": null,
"profile_sidebar_border_color": "C0DEED",
"profile_use_background_image": true,
"profile_background_image_url_https": null
}
}
}
```
## Examples
For an example code implementation of the above custom OAuth methods check out this simple **React + Next.js**
application:
You'll also find custom Phone and Email authentication examples in the same repository.
## Next Steps
After integrating Para, you can explore other features and integrations to enhance your Para experience.
 }
{(iconUrl || fontAwesomeIcon) &&
}
{(iconUrl || fontAwesomeIcon) &&
 }
}