e.stopPropagation()}>

}
{title &&
}
{title}
} {description &&{description}
{description}
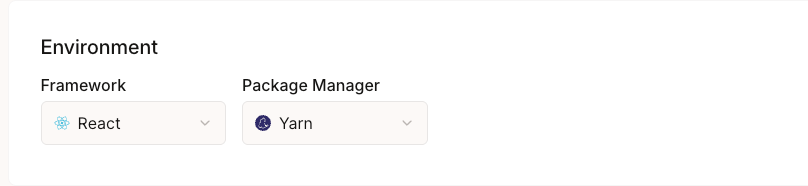 ### Framework Selection
Choose your primary framework to receive tailored integration examples:
* **React**: For React applications and Next.js projects
* **Vue**: For Vue.js applications and Nuxt projects
* **Svelte**: For Svelte and SvelteKit applications
* **React Native**: For mobile applications
* **Flutter**: For cross-platform mobile development
### Package Manager
Select your preferred package manager for installation commands:
* **npm**: Default Node.js package manager
* **yarn**: Alternative package manager with workspace support
* **pnpm**: Fast, disk space efficient package manager
## Network Configuration
Configure which blockchain networks your application supports and require users to connect.
### Framework Selection
Choose your primary framework to receive tailored integration examples:
* **React**: For React applications and Next.js projects
* **Vue**: For Vue.js applications and Nuxt projects
* **Svelte**: For Svelte and SvelteKit applications
* **React Native**: For mobile applications
* **Flutter**: For cross-platform mobile development
### Package Manager
Select your preferred package manager for installation commands:
* **npm**: Default Node.js package manager
* **yarn**: Alternative package manager with workspace support
* **pnpm**: Fast, disk space efficient package manager
## Network Configuration
Configure which blockchain networks your application supports and require users to connect.
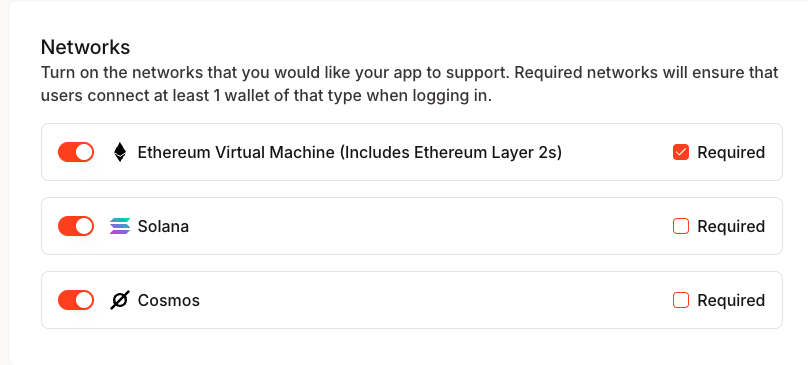 ### Available Networks
* **Ethereum (EVM)**: Includes Ethereum Layer 2 networks
* **Solana**: Solana blockchain network
* **Cosmos**: Cosmos ecosystem networks
### Network Requirements
Toggle "Required" for networks where users must connect at least one wallet of that type during login. This ensures users have the necessary wallet connections for your application's functionality.
## Domain Security
Configure allowed origins to secure your API requests and prevent unauthorized access.
### Available Networks
* **Ethereum (EVM)**: Includes Ethereum Layer 2 networks
* **Solana**: Solana blockchain network
* **Cosmos**: Cosmos ecosystem networks
### Network Requirements
Toggle "Required" for networks where users must connect at least one wallet of that type during login. This ensures users have the necessary wallet connections for your application's functionality.
## Domain Security
Configure allowed origins to secure your API requests and prevent unauthorized access.
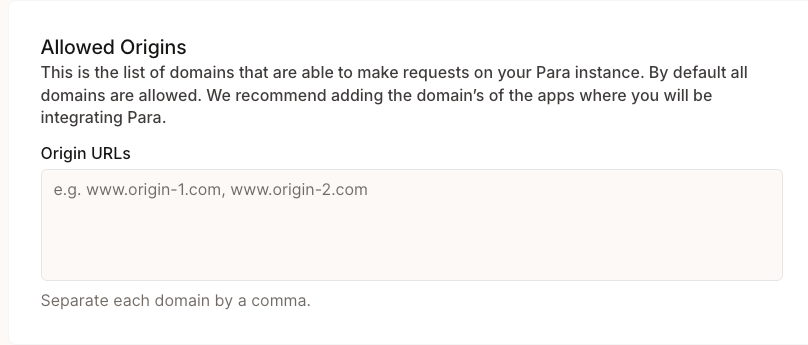 ### Origin URLs
Add your application's domains to the allowed origins list:
```
www.yourapp.com, app.yourapp.com, localhost:3000
```
### Security Best Practices
* Add only necessary domains to minimize attack surface
* Include all environments (development, staging, production)
* Separate multiple domains with commas
* Use HTTPS in production environments
## Email Configuration
Configure email settings for user verification and communication.
### Origin URLs
Add your application's domains to the allowed origins list:
```
www.yourapp.com, app.yourapp.com, localhost:3000
```
### Security Best Practices
* Add only necessary domains to minimize attack surface
* Include all environments (development, staging, production)
* Separate multiple domains with commas
* Use HTTPS in production environments
## Email Configuration
Configure email settings for user verification and communication.
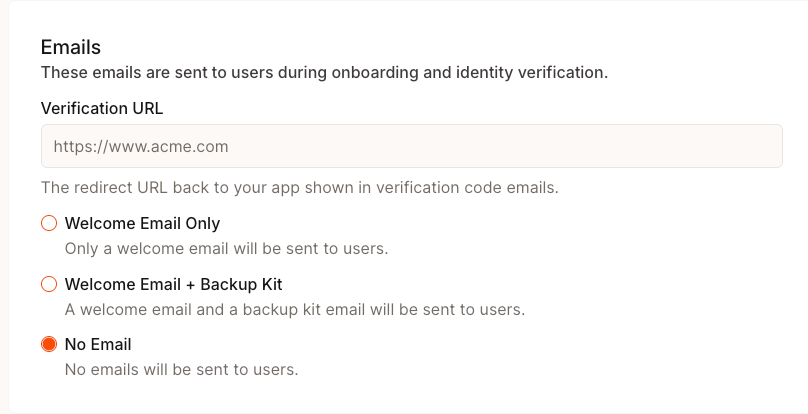 Configure the theming of emails sent to your users on the page.
### Verification URL
Set the redirect URL displayed in verification emails that users receive. This should point to your application where users complete the authentication process.
### Email Types
Choose which emails Para sends to your users:
* **Welcome Email Only**: Send only welcome emails to new users
* **Welcome Email + Backup Kit**: Include backup kit instructions for new wallets
* **No Email**: Disable all automated emails (except OTP emails)
## Pricing
Para's free tier includes 1,200 monthly active users at no cost — no credit card required to get started. This gives you plenty of room to build and test your integration before considering a paid plan.
Configure the theming of emails sent to your users on the page.
### Verification URL
Set the redirect URL displayed in verification emails that users receive. This should point to your application where users complete the authentication process.
### Email Types
Choose which emails Para sends to your users:
* **Welcome Email Only**: Send only welcome emails to new users
* **Welcome Email + Backup Kit**: Include backup kit instructions for new wallets
* **No Email**: Disable all automated emails (except OTP emails)
## Pricing
Para's free tier includes 1,200 monthly active users at no cost — no credit card required to get started. This gives you plenty of room to build and test your integration before considering a paid plan.