> ## Documentation Index
> Fetch the complete documentation index at: https://docs.getpara.com/llms.txt
> Use this file to discover all available pages before exploring further.
# Get Your API Key
> Get your API key and configure your Para integration through the developer portal.
export const DeveloperPortalNextSteps = ({basePath, current, implementationHref, implementationTitle = "Implementation Guide", implementationDescription = "Continue with your selected integration path."}) => {
const pages = [{
id: "setup",
title: "Portal Setup",
description: "Configure API keys, environments, networks, domains, and email settings.",
slug: "developer-portal-setup"
}, {
id: "email",
title: "Email Branding",
description: "Customize Welcome and OTP emails with your brand colors, fonts, and logos.",
slug: "developer-portal-email-branding"
}, {
id: "payments",
title: "Payment Integration",
description: "Configure payment providers and transaction features for crypto onramps and offramps.",
slug: "developer-portal-payments"
}, {
id: "security",
title: "Security Settings",
description: "Configure authentication methods, session management, and transaction permissions.",
slug: "developer-portal-security"
}];
return <>
;
};
export const Link = ({href, label, newTab = false}) => {
const [isHovered, setIsHovered] = useState(false);
return setIsHovered(true)} onMouseLeave={() => setIsHovered(false)}>
{label}
;
};
Get your API key and configure your Para integration through the . Your API key is required to initialize the Para SDK and enables you to manage your application's settings including supported networks, allowed domains, and email configuration.
Prefer the terminal? The can create API keys with `para keys create`, manage API key settings with `para keys config`, and validate your project with `para doctor`. Teams using Claude, Codex, or other coding agents can also follow the .
## Get Your API Key
1. Sign up or log in at
2. Create a new project or select an existing one
3. Copy your API key from the dashboard
Your API key includes an environment prefix (`BETA_` or `PROD_`) that determines which Para environment you're connecting to. Use `BETA_` keys during development for access to test credentials.
Use `BETA_` keys during development and switch to `PROD_` keys only when your integration is ready for production traffic.
## Environment Configuration
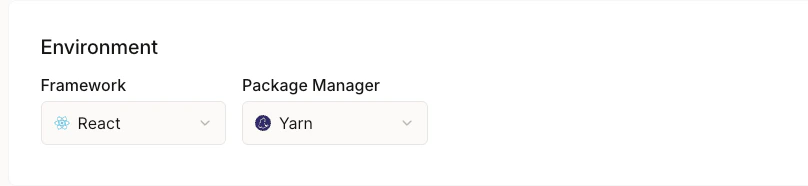
Set up your development environment to match your application's framework and package manager preferences. This provides tailored integration examples and installation commands for the SDK path you are using.
### Framework Selection
Choose your primary framework to receive tailored integration examples:
* **React**: For React applications and Next.js projects
* **Vue**: For Vue.js applications and Nuxt projects
* **Svelte**: For Svelte and SvelteKit applications
* **React Native**: For mobile applications
* **Flutter**: For cross-platform mobile development
### Package Manager
Select your preferred package manager for installation commands:
* **npm**: Default Node.js package manager
* **yarn**: Alternative package manager with workspace support
* **pnpm**: Fast, disk space efficient package manager
## Network Configuration
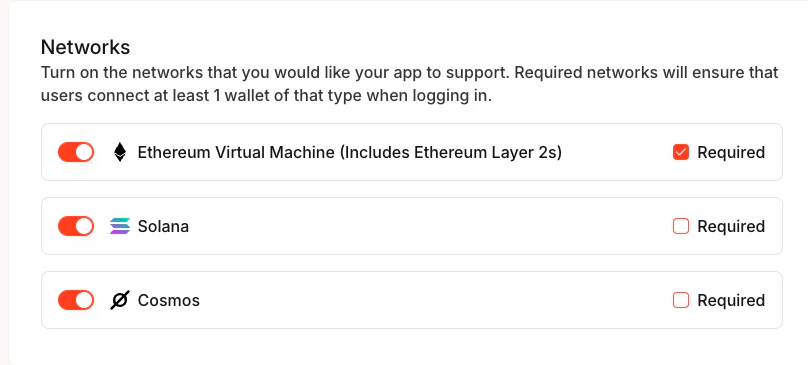
Configure which blockchain networks your application supports and require users to connect.
This will configure which wallet options are available during user authentication. Your app will receive wallets for each required network.
### Available Networks
* **Ethereum (EVM)**: Includes Ethereum Layer 2 networks
* **Solana**: Solana blockchain network
* **Cosmos**: Cosmos ecosystem networks
### Network Requirements
Toggle "Required" for networks where users must connect at least one wallet of that type during login. This ensures users have the necessary wallet connections for your application's functionality.
## Domain Security
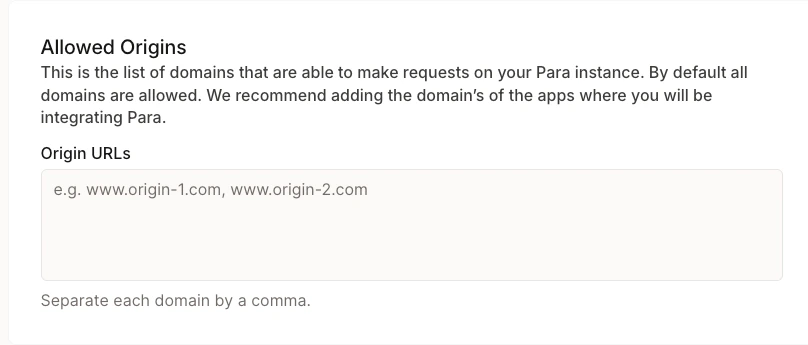
Configure allowed origins to secure your API requests and prevent unauthorized access.
This prevents unauthorized domains from making API requests to your Para integration. Allowed Origins are only supported for web integrations, not server or mobile.
### Origin URLs
Add your application's domains to the allowed origins list:
```
www.yourapp.com, app.yourapp.com, localhost:3000
```
### Security Best Practices
* Add only necessary domains to minimize attack surface
* Include all environments (development, staging, production)
* Separate multiple domains with commas
* Use HTTPS in production environments
## Email Configuration
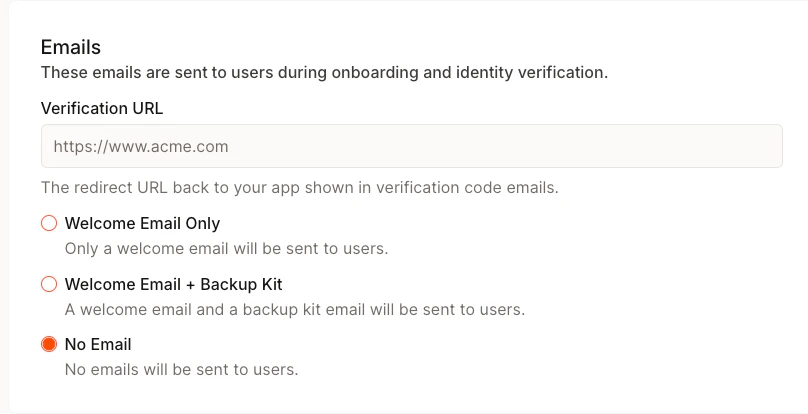
Configure email settings for user verification and communication.
Configure the theming of emails sent to your users on the Email Branding page in this Developer Portal group.
### Verification URL
Set the redirect URL displayed in verification emails that users receive. This should point to your application where users complete the authentication process.
### Email Types
Choose which emails Para sends to your users:
* **Welcome Email Only**: Send only welcome emails to new users
* **Welcome Email + Backup Kit**: Include backup kit instructions for new wallets
* **No Email**: Disable all automated emails (except OTP emails)
## Pricing
Para's free tier includes 1,200 monthly active users at no cost, with no credit card required to get started. This gives you plenty of room to build and test your integration before considering a paid plan.
You can monitor your MAU usage in the Developer Portal dashboard. Upgrade to a paid plan anytime if you need more capacity.
 ### Framework Selection
Choose your primary framework to receive tailored integration examples:
* **React**: For React applications and Next.js projects
* **Vue**: For Vue.js applications and Nuxt projects
* **Svelte**: For Svelte and SvelteKit applications
* **React Native**: For mobile applications
* **Flutter**: For cross-platform mobile development
### Package Manager
Select your preferred package manager for installation commands:
* **npm**: Default Node.js package manager
* **yarn**: Alternative package manager with workspace support
* **pnpm**: Fast, disk space efficient package manager
## Network Configuration
Configure which blockchain networks your application supports and require users to connect.
### Framework Selection
Choose your primary framework to receive tailored integration examples:
* **React**: For React applications and Next.js projects
* **Vue**: For Vue.js applications and Nuxt projects
* **Svelte**: For Svelte and SvelteKit applications
* **React Native**: For mobile applications
* **Flutter**: For cross-platform mobile development
### Package Manager
Select your preferred package manager for installation commands:
* **npm**: Default Node.js package manager
* **yarn**: Alternative package manager with workspace support
* **pnpm**: Fast, disk space efficient package manager
## Network Configuration
Configure which blockchain networks your application supports and require users to connect.
 ### Available Networks
* **Ethereum (EVM)**: Includes Ethereum Layer 2 networks
* **Solana**: Solana blockchain network
* **Cosmos**: Cosmos ecosystem networks
### Network Requirements
Toggle "Required" for networks where users must connect at least one wallet of that type during login. This ensures users have the necessary wallet connections for your application's functionality.
## Domain Security
Configure allowed origins to secure your API requests and prevent unauthorized access.
### Available Networks
* **Ethereum (EVM)**: Includes Ethereum Layer 2 networks
* **Solana**: Solana blockchain network
* **Cosmos**: Cosmos ecosystem networks
### Network Requirements
Toggle "Required" for networks where users must connect at least one wallet of that type during login. This ensures users have the necessary wallet connections for your application's functionality.
## Domain Security
Configure allowed origins to secure your API requests and prevent unauthorized access.
 ### Origin URLs
Add your application's domains to the allowed origins list:
```
www.yourapp.com, app.yourapp.com, localhost:3000
```
### Security Best Practices
* Add only necessary domains to minimize attack surface
* Include all environments (development, staging, production)
* Separate multiple domains with commas
* Use HTTPS in production environments
## Email Configuration
Configure email settings for user verification and communication.
### Origin URLs
Add your application's domains to the allowed origins list:
```
www.yourapp.com, app.yourapp.com, localhost:3000
```
### Security Best Practices
* Add only necessary domains to minimize attack surface
* Include all environments (development, staging, production)
* Separate multiple domains with commas
* Use HTTPS in production environments
## Email Configuration
Configure email settings for user verification and communication.
 Configure the theming of emails sent to your users on the Email Branding page in this Developer Portal group.
### Verification URL
Set the redirect URL displayed in verification emails that users receive. This should point to your application where users complete the authentication process.
### Email Types
Choose which emails Para sends to your users:
* **Welcome Email Only**: Send only welcome emails to new users
* **Welcome Email + Backup Kit**: Include backup kit instructions for new wallets
* **No Email**: Disable all automated emails (except OTP emails)
## Pricing
Para's free tier includes 1,200 monthly active users at no cost, with no credit card required to get started. This gives you plenty of room to build and test your integration before considering a paid plan.
Configure the theming of emails sent to your users on the Email Branding page in this Developer Portal group.
### Verification URL
Set the redirect URL displayed in verification emails that users receive. This should point to your application where users complete the authentication process.
### Email Types
Choose which emails Para sends to your users:
* **Welcome Email Only**: Send only welcome emails to new users
* **Welcome Email + Backup Kit**: Include backup kit instructions for new wallets
* **No Email**: Disable all automated emails (except OTP emails)
## Pricing
Para's free tier includes 1,200 monthly active users at no cost, with no credit card required to get started. This gives you plenty of room to build and test your integration before considering a paid plan.